
Aftercare Instructions
Tattoos
Tattoo Aftercare with Saniderm
-Once Saniderm is applied to the tattoo covering by the artist it will be
recommended to be left on for 7 DAYS, (it will fill up with fluid and this is NORMAL! Please refer to www.saniderm.com with any significant questions). On the 7th Day you will remove the saniderm, (Best to pull off in the shower and wash with a gentle soap such as Tattoo Lovers Care/Dr.Bronners/or Dove).
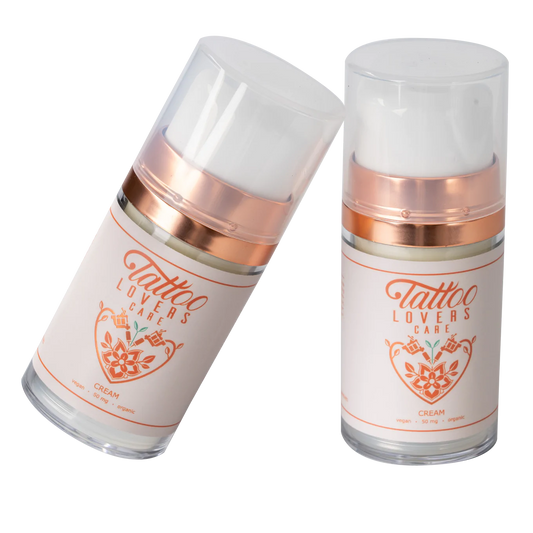
-Once Dried, moisturize with an unscented Lotion such as Lubriderm/ Curel/ or Tattoo Lovers Care Cream.
If the adhesive allergy is an issue, or if the saniderm comes off early we
recommend the following;
1. Gently wash 2-3 times a day with an antibacterial soap, or tattoo lovers care
soap (foam up the unscented soap in your hands, massage for 10-20 seconds min.
and wash your tattoo with lukewarm water)
2. PAT the tattoo dry.
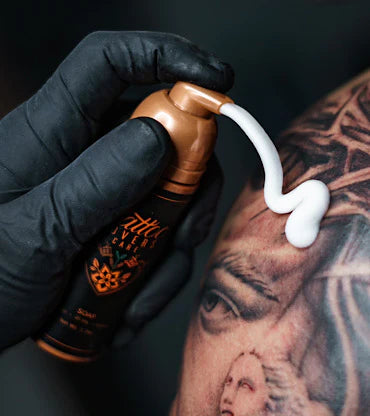
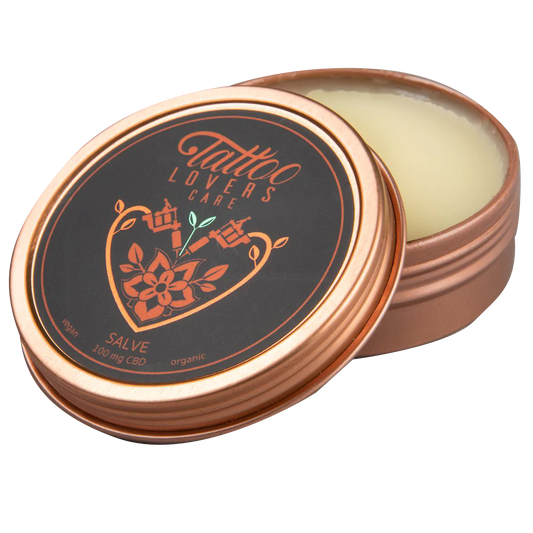
3. Apply a non-scented ointment or salve (Tattoo Lovers Care, Aquaphor, H2Ocean Ointment or CannaCare Salve) to the area.
(only do this until tattoo peels which is roughly 5-7 days).
4. PRIOR to peeling:
● DO NOT ITCH OR SCRATCH TATTOO (instead pat it gently)
● NO SWIMMING, NO HOTTUBS, NO HOT SHOWERS ON THE AREA (steam can push pigment out)
● AVOID SOAKING TATTOO (in shower)
● DO NOT EXPOSE TATTOO TO DIRECT SUNLIGHT OR BACTERIA/ DIRT DEBRIS
● AVOID TIGHT CLOTHING,AVOID WORKING OUT/ SWEATING ON
TATTOO, AVOID SWELLING, NO ZINC BASED OINTMENTS
5 Once the tattoo has begun to peel, switch from ointment/salve to an unscented
lotion (Tattoo Lovers Care Cream, Lubriderm, Curel, H2Ocean Cream) Continue to
use for 4 weeks and even thereafter to keep tattoo bright
SIGNS OF INFECTION
● Redness around the tattoo
● Prolong Swelling
● Sensitivity to the touch
● Pus
● Bumps
Please Seek a physician if there are any of the following:
● Swelling (Allergic Reaction)
● Infection (Pus)
● Heat
● Illness
TATTOOS SHOULD BE HEALED WITHIN 4-6 WEEKS.
If you have ANY questions please call our SHOP Sharky’s Paradise 720.504.6533
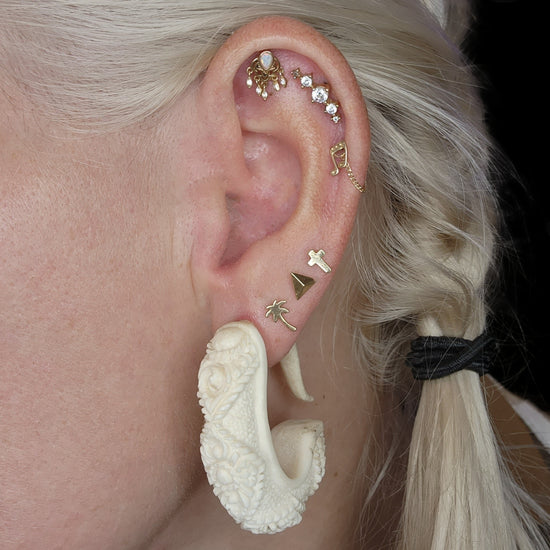
Piercings
-Wash your hands before touching on (or near) a healing piercing.
-Applying Emu Oil or a Piercing Spray every morning and everynight will help to kill any bacteria and keep the area clean.
- In most cases maintain clean hygiene and avoiding trauma are vital;
SURFACE ANCHORS:
• These piercings require maintenance during their entire lifetime
because matter can build up underneath the threaded top causing
the piercing to become irritated.
Saline and/or shower rinses may be helpful with removing matter
from underneath the threaded top.
• Avoid putting makeup on these piercings even after healing.
• Even with proper care, surface anchors may be less permanent
than other body piercings.
ALTERNATIVE AFTERCARE
• Aftercare is an evolving conversation in the progression of body
piercing. Aftercare needs can differ from one region and climate
to another and not all products are widely available, discuss your
specific needs with your body piercer.
If you choose to use soap
on a healing piercing consider using a gentle soap free from harsh
chemicals, dyes, and perfumes. The use of an antibacterial soap is
not suggested as it may over-dry and irritate your piercing.
If your
piercer suggests the use of a soap fully rinse away product after
use.
• If sterile saline is not available in your region a sea salt solution
mixture can be a viable alternative. Dissolve 1∕8 to 1⁄4 teaspoon
(.75 to 1.42 grams) of non-iodized (iodine free), fine grain sea salt
into one cup (8 oz. / 250ml) of warm distilled or bottled water. A
stronger mixture is not better; salt solution that is too strong can
irritate the piercing.
CLEANING SOLUTIONS
• Packaged sterile saline is a gentle choice for piercing aftercare. Mixing
your own sea salt solution is no longer a suggested practice from
the APP. We strongly encourage you to use a sterile saline labeled
for use as a wound wash. Contact lens saline, eye drops, and other
saline products should never be used on a body piercing. Your saline
ingredients should list .09% sodium chloride as the only ingredient.
Mixing your own sea salt solution will commonly result in the product
being far too salty and strong, this can over dry the piercing and
interfere with healing.
CLEANING INSTRUCTIONS FOR
BODY PIERCINGS
• WASH your hands thoroughly prior to cleaning or touching your piercing
for any reason.
•SALINE rinse as needed while healing. For certain piercings it may be
easier to apply using clean gauze saturated with saline solution.
•RINSE site as needed to remove cleaning solution residue. Moving or
rotating jewelry is not necessary during cleaning or rinsing.
• DRY by gently patting with clean, disposable paper products. Cloth
towels can harbor bacteria and snag on jewelry causing injury.
WHAT IS NORMAL?
• Initially: some bleeding, localized swelling, tenderness, and/or bruising.
• During healing: some discoloration, itching, secretion of a whitish-
yellow fluid (not pus) that will form some crust on the jewelry. The
tissue may tighten around the jewelry as it heals.
• Once healed: the jewelry may not move freely in the piercing; do not
force it. If you fail to include cleaning your piercing as part of your daily
hygiene routine, normal but smelly bodily secretions may accumulate.
• A piercing might seem healed before the healing process is complete.
This is because tissue heals from the outside in, and although it
feels fine, the interior remains fragile. Be patient, and keep cleaning
throughout the entire initial healing period.
• Even healed piercings that you have had for years can shrink or close
in minutes! This varies from person to person; if you like your piercing,
keep jewelry in - do not leave the hole empty.
WHAT TO DO
• Wash your hands prior to touching the piercing; leave it alone except
when cleaning. During healing it is not necessary to rotate your jewelry.
• Exercise during healing is fine; listen to your body.
• Make sure your bedding is washed and changed regularly. Wear clean,
comfortable, breathable clothing that protects your piercing while you
are sleeping.
• Showers tend to be safer than taking baths, as bathtubs can harbor
bacteria. If you bathe in a tub, clean it well before each use and rinse
off your piercing when you get out.
TO STAY HEALTHY
• The healthier your lifestyle, the easier it will be for your piercing to
heal.
• Get enough sleep.
• To help healing and bolster your ability to fight infection, eat a
nutritious diet.1
WHAT TO AVOID
• Avoid cleaning with alcohol, hydrogen peroxide, antibacterial soaps,
iodine, or any harsh products, as these can damage cells. Also avoid
ointments as they prevent necessary air circulation.
• Avoid Bactine®, pierced ear care solutions, and other products
containing Benzalkonium Chloride (BZK). These can be irritating and
are not intended for long-term wound care.
• Avoid over-cleaning. This can delay your healing and irritate your
piercing.
• Avoid undue trauma such as friction from clothing, excessive motion
of the area, playing with the jewelry, and vigorous cleaning. These
activities can cause the formation of unsightly and uncomfortable
scar tissue, migration, prolonged healing, and other complications.
• Avoid all oral contact, rough play, and contact with others’ bodily fluids
on or near your piercing during healing.
• Avoid stress and recreational drug use, including excessive caffeine,
nicotine, and alcohol.
• Avoid submerging the piercing in unhygienic bodies of water such as
lakes, pools, hot tubs, etc. Or, protect your piercing using a waterproof
wound-sealant bandage. These are available at most drugstores and
work best for nipple, navel, and surface piercing placements.
• Avoid all beauty and personal care products on or around the piercing
including cosmetics, lotions, and sprays, etc.
• Don’t hang charms or any object from your jewelry until the piercing
is fully healed.
• Sleeping directly on a healing cartilage piercing can cause irritation,
even causing shifts in the piercing’s angle. Placing a travel pillow, on
top of your pillow, and then placing your ear in the opening can be
helpful to avoid this.
HINTS AND TIPS
JEWELRY:
• Unless there is a problem with the size, style, or material of the
initial jewelry, leave it in the place for the entire healing period. See
a qualified piercer to perform any jewelry change that becomes
necessary during healing.
• Contact your piercer for a non-metallic jewelry alternative if your
metal jewelry must be temporarily removed (such as for a medical
procedure).
• Leave jewelry in at all times. Even healed piercings that you have had
for years can shrink or close in minutes! If removed, reinsertion can
be difficult or impossible. See the APP brochure Preparing for Medical
and Dental Procedures for more information.
• With clean hands or paper products, be sure to regularly check
threaded and threadless ends on your jewelry for tightness.
• Should you decide you no longer want the piercing, simply remove
the jewelry (or have a professional piercer remove it) and continue
cleaning the piercing until the hole closes. In most cases only a small
mark should remain.
• In the event an infection is suspected, quality jewelry or an inert
alternative may be left in place to allow for drainage of the infection,
if approved by your physician. On rare occasion, when the jewelry
is removed, the surface cells close up, which can seal the infection
inside the piercing channel and result in an abscess. Until an infection
is cleared up, discuss with your physician if you should leave in quality
jewelry or an appropriate substitute.
FOR PARTICULAR AREAS
NAVEL:
• A hard, vented eye patch (sold at pharmacies) can be applied under
tight clothing (such as nylon stockings) or secured using a length of
elastic bandage around the body (to avoid irritation from adhesive).
This can protect the area from restrictive clothing, excess irritation,
and impact during physical activities such as contact sports.
EAR/EAR CARTILAGE AND FACIAL:
• Use the t-shirt trick: Dress your pillow in a large, clean t-shirt and turn
it nightly; one clean t-shirt provides four clean surfaces for sleeping.
• Maintain cleanliness of phones, headphones, eyeglasses, helmets,
hats, and anything that contacts the pierced area.
• Use caution when styling your hair and advise your stylist of a new or
healing piercing.
NIPPLE:
• The support of a tight cotton shirt or sports bra may provide protection
and feel comfortable, especially for sleeping.
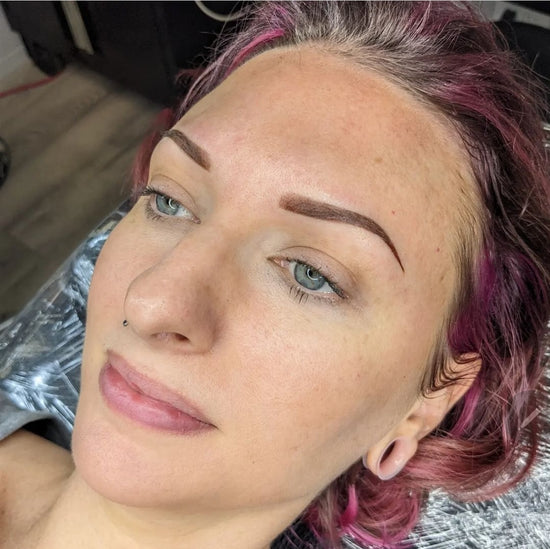
Permanent Makeup
Microblading post-care and Semi-permanent makeup post-care is very important to the
appearance and longevity of your new eyebrows. Please read the following eyebrow
aftercare carefully as they apply to all of our eyebrows treatments: Microblading,
Powder Brows, Combo Brows, Ombre Brows, and Nano brows
Eyebrow Aftercare Instructions
(7-14 Days)
1. Wash the treated area twice daily (morning and night), with a gentle cleanser (ex. Tattoo Lovers
Care Soap, Baby soap, cetaphil). This will help to remove bacteria. Cleanse with a very light touch
using your fingertips.
2. Rub the area in a smooth motion for 10 seconds and rinse with lukewarm water to ensure that all
soap is washed away.
3. To dry, gently pat with a clean tissue. Do not use any cleansing products containing acids (glycolic,
lactic, AHA) or exfoliants.
4. After cleansing the area apply a small amount of your aftercare product 3 times a day with a cotton
swab. The product should be a nice, nice thin layer.
5. Never apply the product on a wet or damp tattoo.
6. Use a fresh pillow case while you sleep.
7. Let any scabbing or dry skin naturally exfoliate away. Picking at the area can cause scarring or
loss of pigment.
8. No facials, botox, chemical peels or microdermabrasion for 4 weeks.
9. Avoid hot, intense exercising for 72 hours, steam can push pigment out.
10. Avoid direct sun exposure or tanning beds for 2 weeks after the procedure. Wear a hat when
outside.
11. Avoid long, hot showers for the first 10 days.
12. When showering, keep your face/procedure area out of the water.
13. Avoid sleeping on your face for the first 10 days.
14. Avoid face down swimming, lakes, and hot tubs for the first 10 days.
15. Avoid topical makeup or sunscreen on the area for 14 days.
16. Do not rub, pick or scratch the area.
17. No waxing the area for 14 days.
18. Drink plenty of water following your procedure.
19. If you experience any burning or fever following your procedure, please contact your healthcare
provider.
Reminder: Permanent Makeup is a layering process and may require 1-2 touch ups before the process is considered
to be complete. During the healing stage of your first application your tattoo may fade 20 percent, for lips it can be
50%. This is why touch ups are necessary. Also keep in mind your ink will disappear around week 3-4 only to
reappear even brighter!
In case of any serious questions contact Jessica directly 303-990-0203 or at the shop 720-504-6533
This is a Boulder County Health Department Licensed Facility
Facility Address: Sharky’s Paradise Tattoo, Piercing and Permanent Makeup
233 Main St
Longmont, CO 80501
(720) 504. 6533
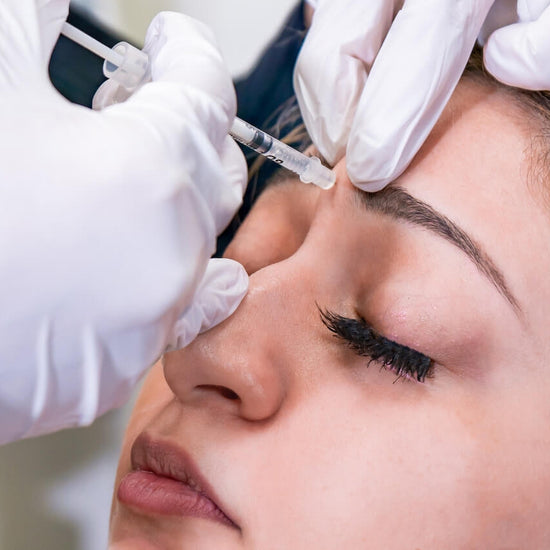
Neurotoxin Injections/Botox
Botox aftercare instructions
The goal of Botox aftercare is to encourage optimal treatment results. It can also minimize the risk of bruising
and spreading to other areas.
Generally, on the day you get Botox, it’s a good idea to:
● gently exercise your face
● relax for the rest of the day
● maintain a normal heart rate
● avoid touching, rubbing, or physical pressure on the affected area
● leave the treated area alone
You can also follow the best practices for Botox aftercare below.
Return to your normal activities
Botox injections don’t require any recovery time. Therefore, you won’t have to take off work or school. You
can resume your usual activities right after.
Wait 24 hours to exercise
If exercise is part of your daily routine, wait at least 24 hours to work out. Your doctor might suggest waiting
for several days.
Physical activity increases blood flow. This could potentially spread the toxin to unintended areas and reduce
its effectiveness at the injection site. It also increases the risk of bruising.
Exercise also contracts your muscles, which may decrease the toxin’s effectiveness.
However, it’s safe to do facial exercises like:
● frowning
● smiling
● raising your eyebrows
These movements can help the effects of Botox show up sooner.
Go makeup-free
If you received a Botox injection in your face, take a break from makeup for 24 hours. Applying makeup will
rub the skin, potentially dispersing the toxin.
Sit up
Sit up for the first 4 hours after getting Botox. Bending or lying down might spread the toxin and promote
bruising.
Ask your doctor about medications
Some medications might increase your risk of bruising. Be sure to ask your doctor when it’s safe to start taking
them again.
Aftercare precautions
Botox aftercare also includes some precautions. On the day of your procedure, here’s what you should keep in
mind.
Don’t drink alcohol
Before getting Botox, you’ll be asked to avoid alcohol for 24 hours. Alcohol increases the risk of bruising.
This holds true after the procedure, too. Wait at least 24 hours after your injection before consuming alcohol.
Don’t touch your face
To avoid spreading the toxin, don’t touch your face for at least 1 day. Some doctors suggest waiting 3 days.
If you got Botox in another part of your body, you should also avoid touching those areas.
This includes professional massages on the treated areas. It’s best to schedule your next massage for several
days later.
Avoid other skin treatments
Botox needs some time to settle into the muscle. For the first 24 hours, avoid other skin treatments like:
● facials
● facial massages
● exfoliating scrubs
● dermal fillers
Getting these treatments too soon may reduce the effectiveness of your injections.
Don’t sleep on the treated areas
Try your best to avoid sleeping on the injected areas. This will minimize the physical pressure and let the
Botox settle into your muscles.
Also, avoid sleeping within 4 hours after your procedure.
Stay out of the sun
Avoid sun exposure for at least 4 hours. The heat can promote flushing and increase your blood pressure,
which may encourage bruising. To be extra safe, avoid the sun for 24 to 48 hours.
It’s also best to avoid other forms of heat exposure, such as:
● tanning bed
● hot tubs
● hot showers or baths
● saunas
When to see a doctor
After getting Botox, it’s typical to have redness, tenderness, and swelling. These side effects usually disappear
in 1 day.
Bruising is also common. You can apply a pack of ice for relief. The bruising should go away in about 2
weeks.
But if you notice any of the following effects, get medical help:
● muscle weakness
● trouble swallowing
● difficulty speaking
● difficulty breathing
● poor bladder control
● vision changes
Although these side effects are rare, they warrant immediate medical attention.
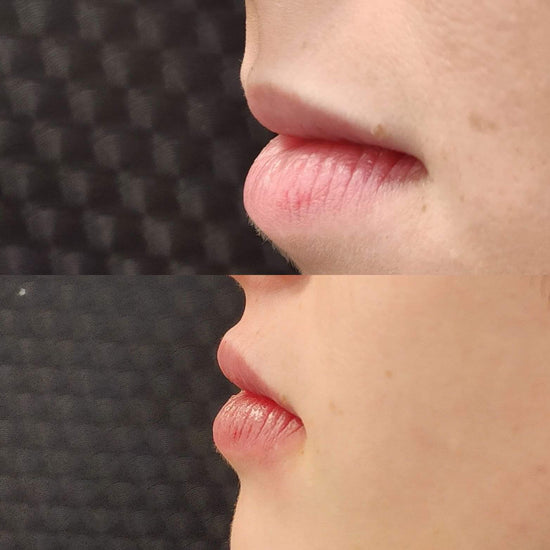
Dermal Fillers
No sleeping on your face for 2 days
No massage, no exercise , no makeup for 24hoursFor Lip filler- no massage no exercise no makeup for 24 hrs, also no heavy lip use including straw and kissing for 24 hours No sleeping on face for two days
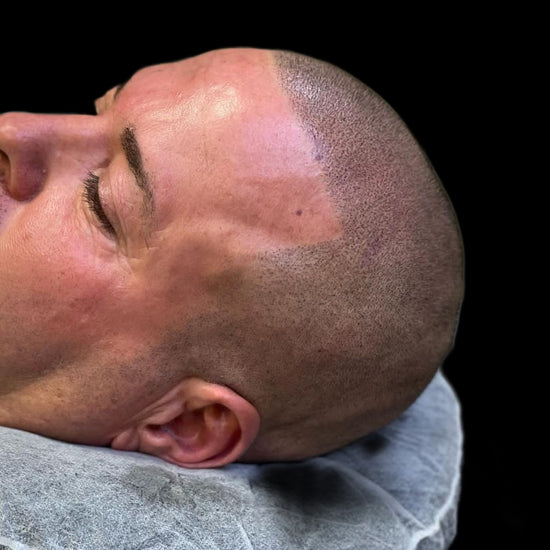
Scalp Micropigmentation
1. Gently wash 2-3 times a day with an antibacterial soap, or tattoo lovers care
soap(foam up the unscented soap in your hands, massage for 10-20 seconds min.
and wash your tattoo with lukewarm water) PAT the tattoo dry.
2. Apply a non-scented ointment or salve(Tattoo Lovers Care, Aquaphor, Green
Goo, Tattoo Magic, H2Ocean Ointment, or A&D) to the area after washed and
dried (only do this until tattoo peels which is roughly 3-4 days).
3. PRIOR to peeling:
● DO NOT ITCH OR SCRATCH TATTOO (instead pat it gently)
● NO SWIMMING, NO HOTTUBS, NO HOT SHOWERS ON THE AREA
● AVOID SOAKING TATTOO (in shower)
● DO NOT EXPOSE TATTOO TO DIRECT SUNLIGHT OR BACTERIA/ DIRT
DEBRIS
● AVOID TIGHT CLOTHING,AVOID WORKING OUT/ SWEATING ON
TATTOO, AVOID SWELLING, NO ZINC BASED OINTMENTS
4. Once the tattoo has begun to peel, switch from ointment/salve to an unscented
lotion (Tattoo Lovers Care Crea, Lubriderm, Curel, H2Ocean Cream) Continue to
use for 4 weeks and even thereafter to keep tattoo bright
SIGNS OF INFECTION
● Redness around the tattoo
● Prolong Swelling
● Sensitivity to the touch
● Pus
● Bumps
Please Seek a physician if there are any of the following:
● Swelling (Allergic Reaction)
● Infection (Pus)
● Heat
● Illness
TATTOOS SHOULD BE HEALED WITHIN 4-6 WEEKS.
If you have ANY questions please call our SHOP Sharky’s Paradise 720.504.6533

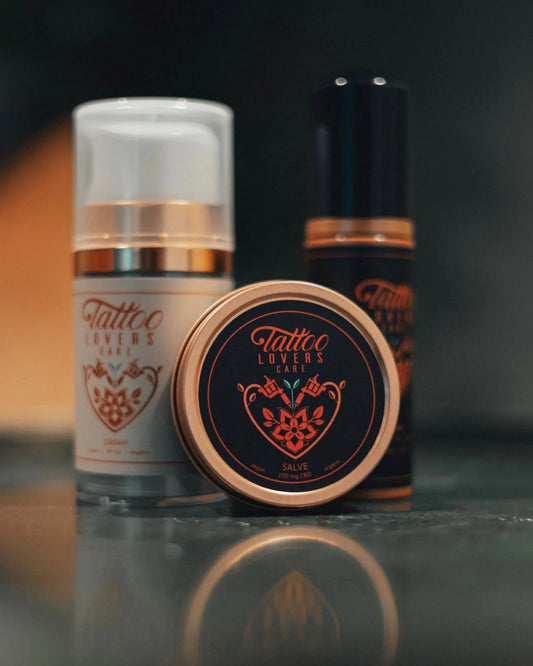
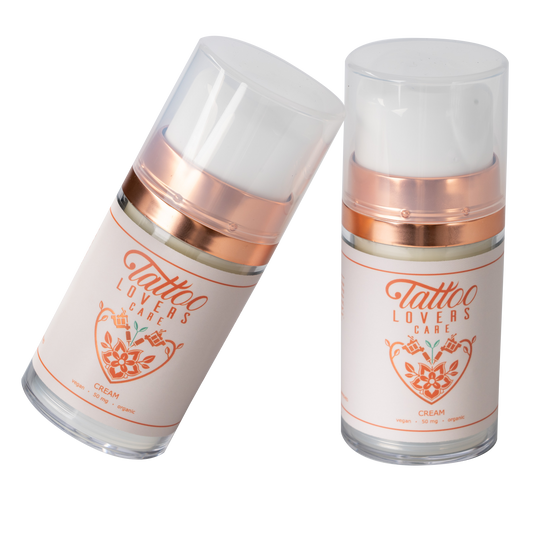
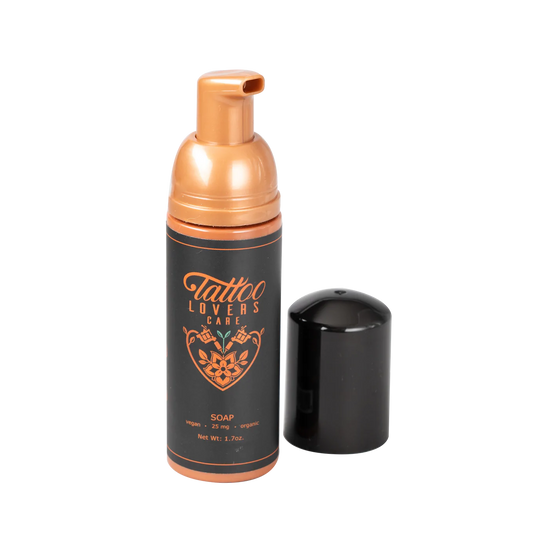
Aftercare Products
-
Bundle Trio Aftercare Kit
Vendor:Tattoo Lovers CareRegular price $65.00 USDRegular priceUnit price per
Aftercare FAQs
What is Saniderm?
Saniderm is a medical-grade, waterproof tattoo bandage that is breathable and used like a “second skin” to heal your tattoo.
Before we begin discussing how Saniderm works, you first have to understand how tattoo healing works. Let’s take a quick look.
What is That Smell? How Wet Wound Healing Works:
When you apply Saniderm to a fresh tattoo, you are instructed to leave the bandage on for 24 hours. As mentioned above, your tattoo will weep bodily fluid during this 24-hour period (and sometimes longer) causing your tattoo’s second skin to smell.
This fluid is a combination of excess ink that your skin didn’t take, blood, plasma, and lymph fluid. It is actually highly beneficial to allow your tattoo to “soak” in this fluid for a period of time. Plasma and lymph fluid are filled with white blood cells, which keep the wound site moist and aid in healing.
However, the cells in your plasma are only viable for about 24 hours. Once these cells begin “dying” or losing viability (one reason why we recommend removing the first Saniderm bandage and reapplying a new one after the first 24 hours) they can start to cause the wound site to smell unpleasant. Lymph fluid is the primary culprit which, coincidentally, is also what causes gauged ears or body piercings to smell unpleasant while they’re healing.
So What Should You Do If Your Bandaged Tattoo Starts to Smell Bad?
If you’re still within the 24-48 hour window of getting your tattoo, we recommend just removing your Saniderm bandage and applying a new one. Be sure you’re following proper application and removal steps!
If you’re already on day 3-4, presuming there are no signs of infection, complications, or excessive fluid buildup, it’s okay to leave that bandage on for up to the 5-day mark (even if it smells a little bit).